Mindarika adopts microfocus CT to inspect automotive components
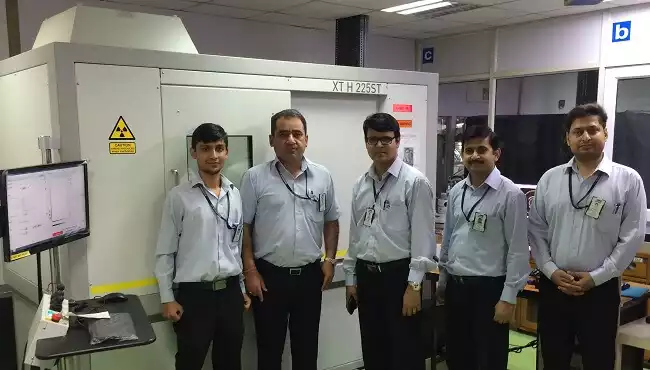
Industry leader Mindarika based in India, designs, develops and manufactures all kinds of electrical switches and safety devices for automotive OEMs. Requiring a non-destructive inspection method, Mindarika install the Nikon Metrology XT H 225 ST to introduce non-destructive testing for an increased insight to maintain customer satisfaction and high levels of quality.
Industry leader Mindarika based in India, designs, develops and manufactures all kinds of electrical switches and safety devices for automotive OEMs. Requiring a non-destructive inspection method, Mindarika install the Nikon Metrology XT H 225 ST to introduce non-destructive testing for an increased insight to maintain customer satisfaction and high levels of quality.

Mindarika is a joint venture between Indian company Minda Industries and Tokai Rika, a Japanese company. Minda Industries, sought the expertise in intelligent transport technologies and safety/security devices for automobiles that Tokai Rika were renowned for, forming Mindarika in 1992.

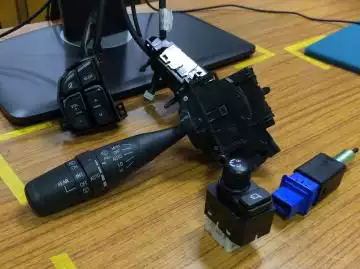
Examples of plastic electronic switches and a lever combination switch prior to inspection.
India is one of the world’s largest motor vehicle manufacturers in the world with nearly 4.6 million vehicles produced annually. By the year 2020, it is estimated that 450 million vehicles will be on the road in India. Today Mindarika holds a 47% market share and is the market and technology leader of automotive switches in India. It is the supplier to all OEMs in the 4-wheeled and commercial vehicles segment with major customers that include Honda, Nissan and Ford, TATA, Maruti Suzuki India Ltd. (MSIL) and Toyota plus many more. With over 1.000 employees harbouring a vast amount of knowledge and innovation, Mindarika designs, develops and manufactures all kinds of electrical switches to be used in vehicles.
To stay ahead of competitors, the industry leader must continuously develop new products with superior quality at a fast rate. The majority of the parts, panels and switches manufactured by Mindarika mainly consist of plastics and electronic components and are found in vehicles worldwide. Parts such as manual, semi-automatic and automatic HVAC control systems, power window switches and lever combination switches make up a large percentage of the items the Interior, Controls & Safety (ICS) domain deal with.
Product quality and customer satisfaction are the priority.
Mindarika has consistently received awards for the quality, efficiency and innovation of its products. These include twice being awarded the “Energy Conservation Award” from Bureau of Energy Efficiency, the “Gold Medal from ACMA for Overall Excellence in Manufacturing” twice and the “Safety and Environmental Award” from Haryana Labour Department amongst many more. Mindarika says that “Such recognition from leading professional institutions is an affirmation that we pull out all the stops for the best products possible, as per the customer needs, priorities and expectations”.
As a company that prides itself on customer satisfaction and high quality standards, it was recognized that Mindarika was ready to upgrade its inspection facilities. The previous destructive methods offered limited repeatability, low level insight and often lead to wasted materials and time. Amit Mishra – Deputy Manager at Mindarika explained that for continuous improvement and to maintain the growth the ICS domain had already shown, investment in the latest inspecting technology was required.
Needing a non-destructive inspection method with fast turnaround times
The ICS domain contributes a substantial percentage of revenue to the group sales and as such, Mindarika knew it was vital to continuously improve, by upgrading its facilities. It was agreed that a non-destructive testing solution was required to modernize the Quality Assurance department. After the decision was made that a microfocus CT system was the equipment required, Mindarika consulted a variety of vendors. With a range of new parts being introduced, a system that was able to analyse internal structures and geometrical alignment with a profound insight was required. For all vendors they consulted, it was paramount for the company to be able to deliver and install the system within four months.
Amit explained that the assembly alignment and perfectly functioning electrical connections are vital for long life operation. To decide on the best solution, a benchmarking test was used based on existing reports from the sample. The results of these tests concluded that the Nikon Metrology XT H 225 ST microfocus CT system offered the best image quality and as such the most profound insight into the components. With the delivery and installation in the desired time frame, Mindarika had no doubt that the Nikon CT system was the ideal solution.
How does CT work?
CT scanners work by positioning an object on a turntable between an X-ray tube and a detector. The detector captures multiple 2D X-ray images of an object as it rotates 360 degrees, acquiring the outer dimensions, internal geometry and density within the object’s walls.
The series of 2D images are then run through a reconstruction algorithm that creates a 3D volumetric model, built from billions of voxels. Each voxel is a 3D cube with a discrete x-y-z location and density.
The digital model can then be sliced and diced, inspected for electrical connectivity, assembly alignments, compared to CAD models, measured, checked for wall thickness and porosity or run through myriad other processes. Individual elements with different densities can be isolated for best visualization, all in a fast, non-destructive process.
Exploring the full potential of the XT H 225 ST

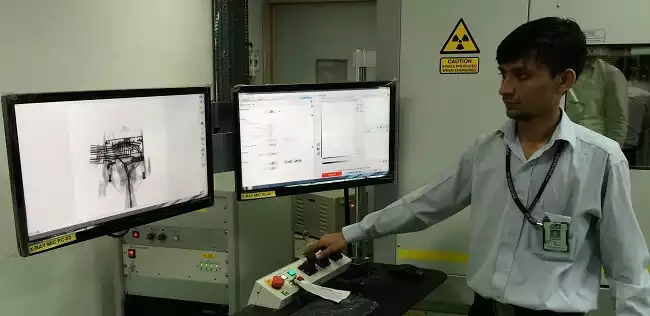
The screen shows live images of a lever combination switch and its internal features.
Amit explained that the increased level of insight that the Nikon solution provides a level of trust in the components that wasn’t achievable before using destructive methods. The improved insight into the conformity of the products leads to faster diagnosis and troubleshooting, improving the efficiency of the QA department.
The 225 kV microfocus CT system is able to deal with a wide range of materials and varying densities. It also enables detailed capture and measurement of internal features, vital for quality control and failure analysis. The XT H 225 ST system is the most flexible system, ideal for quality labs and production facilities with its ability to penetrate a wide range of materials and densities as well as containing sample sizes up to 300 mm in diameter and 50 kg in weight. For Mindarika this solution is perfect as the products they produce vary greatly in size.
Following the installation of the Nikon Metrology system, the QA team at Mindarika have expressed their delight at the capabilities of the system. Amit explained that the system has so many capabilities, that as successful as the system has been thus far, they are still only exploring the full potential. He continued to state that with faster insights into product conformity, the department has seen a global improvement in its productivity. Due to the flexibility of the system, the QA department acts as a central NDT hub and provide X-ray consultancy for the other domains and associate companies.
Nikon Metrology also offers X-ray and CT inspection services. If you are manufacturer of components or assemblies incorporating plastics, metals, ceramics, electronic components or any combination of these, Nikon Metrology has in-house Inspection centers to perform X-ray and CT contract inspection services for new or existing clients.

